My experience w/ Unity and Mixamo
I am currently going through a year-long Capstone project. My teammates asked me to write up a quick tutorial of showing how to get Mixamo characters and animations set up in Unity.
Btw, if you are unfamiliar with Mixamo, it is basically a website belonged to Adobe that provides free rigged character models and animations. It becomes very handy if you are doing a quick game prototype.
P.S.: The reason why the post was titled “Unity and Mixamo” but not something more universal for any usage is simply because our Capstone game project is using Unity.
Table of Contents
- 0. Credits
- 1. General Procedure
- 2. Additional Tips
0. Credits
- How To: Getting Mixamo and Unity to work by cloverme
- How to Import Mixamo Animations in Unity by Walter Palladino
1. General Procedure
This section is heavily based on cloverme’s post on the Unity Forum. For visual demonstration, the tutorial will be using a boy model as an example.
1.1 Setting the environment
First of all, you need to create a Unity project and two new folders under the Assets folder (or other subfolder under Assets).
- The Animations folder will store animations files.
- The Models folder will store any generic humanoid model to test the animations.

1.2 Mixamo model upload
1.2.1 Access to Mixamo
Link: https://www.mixamo.com/
Mixamo is available free for anyone with an Adobe ID and does not require a subscription to Creative Cloud.
Mixamo is available free and does not require any additional purchases or subscriptions.
1.2.2 Upload a custom character model to Mixamo
- To upload a custom character to Mixamo, simply click the Upload Character button on the right. Then, an upload prompt window will show up and that’s where you drag and drop your model file to allow Mixamo process the character for you.
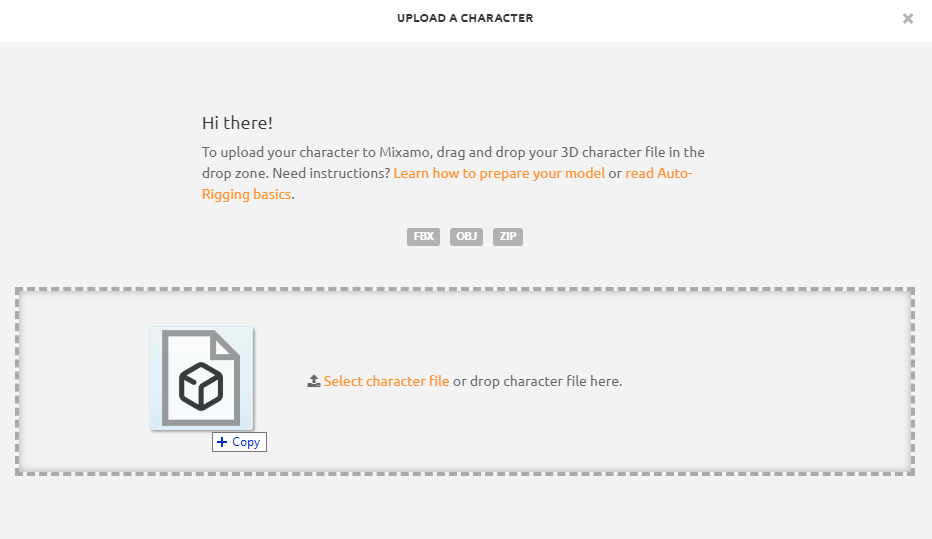
- For detailed instructions regarding the upload steps, you can learn from the two Mixamo guides below:
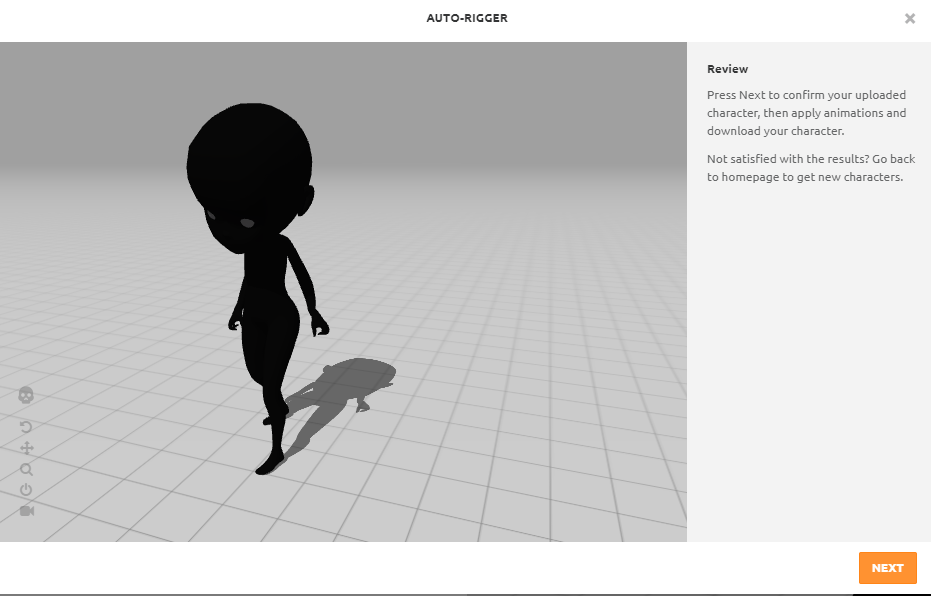
- After taking a moment ofprocessing the uploaded model, Mixamo will show you a review window that displays the result of the rigged character with a sample animation applied to it.
1.2.3 Apply T-pose and download
- There’s a T-pose pose in Mixamo, apply that pose first.
- If your model isn’t recognized by Mixamo’s auto-rigging, ask someone on upwork first to fix the model and put into a T-pose.
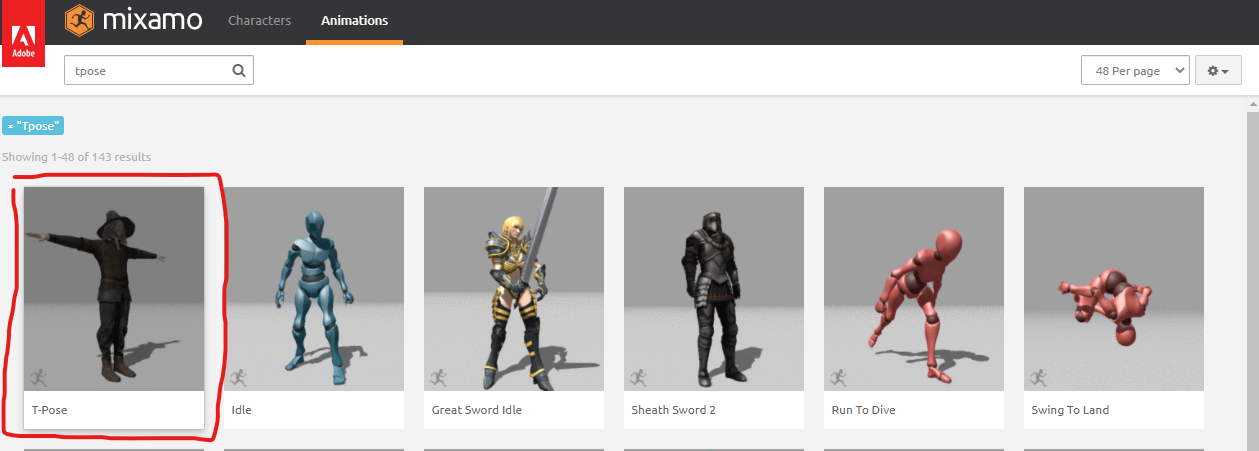
- Download that and only that pose with the skin. Remember to export the animations in the correct format selecting the FBX For Unity option.

- If Mixamo doesn’t recognize your FBX file, try an OBJ format instead.
1.3 Importing the model into Unity
1.3.1 Create an avatar
- Import that exact FBX model you downloaded from Mixamo into your project.
- You should drag it into the Models folder that was created earlier.
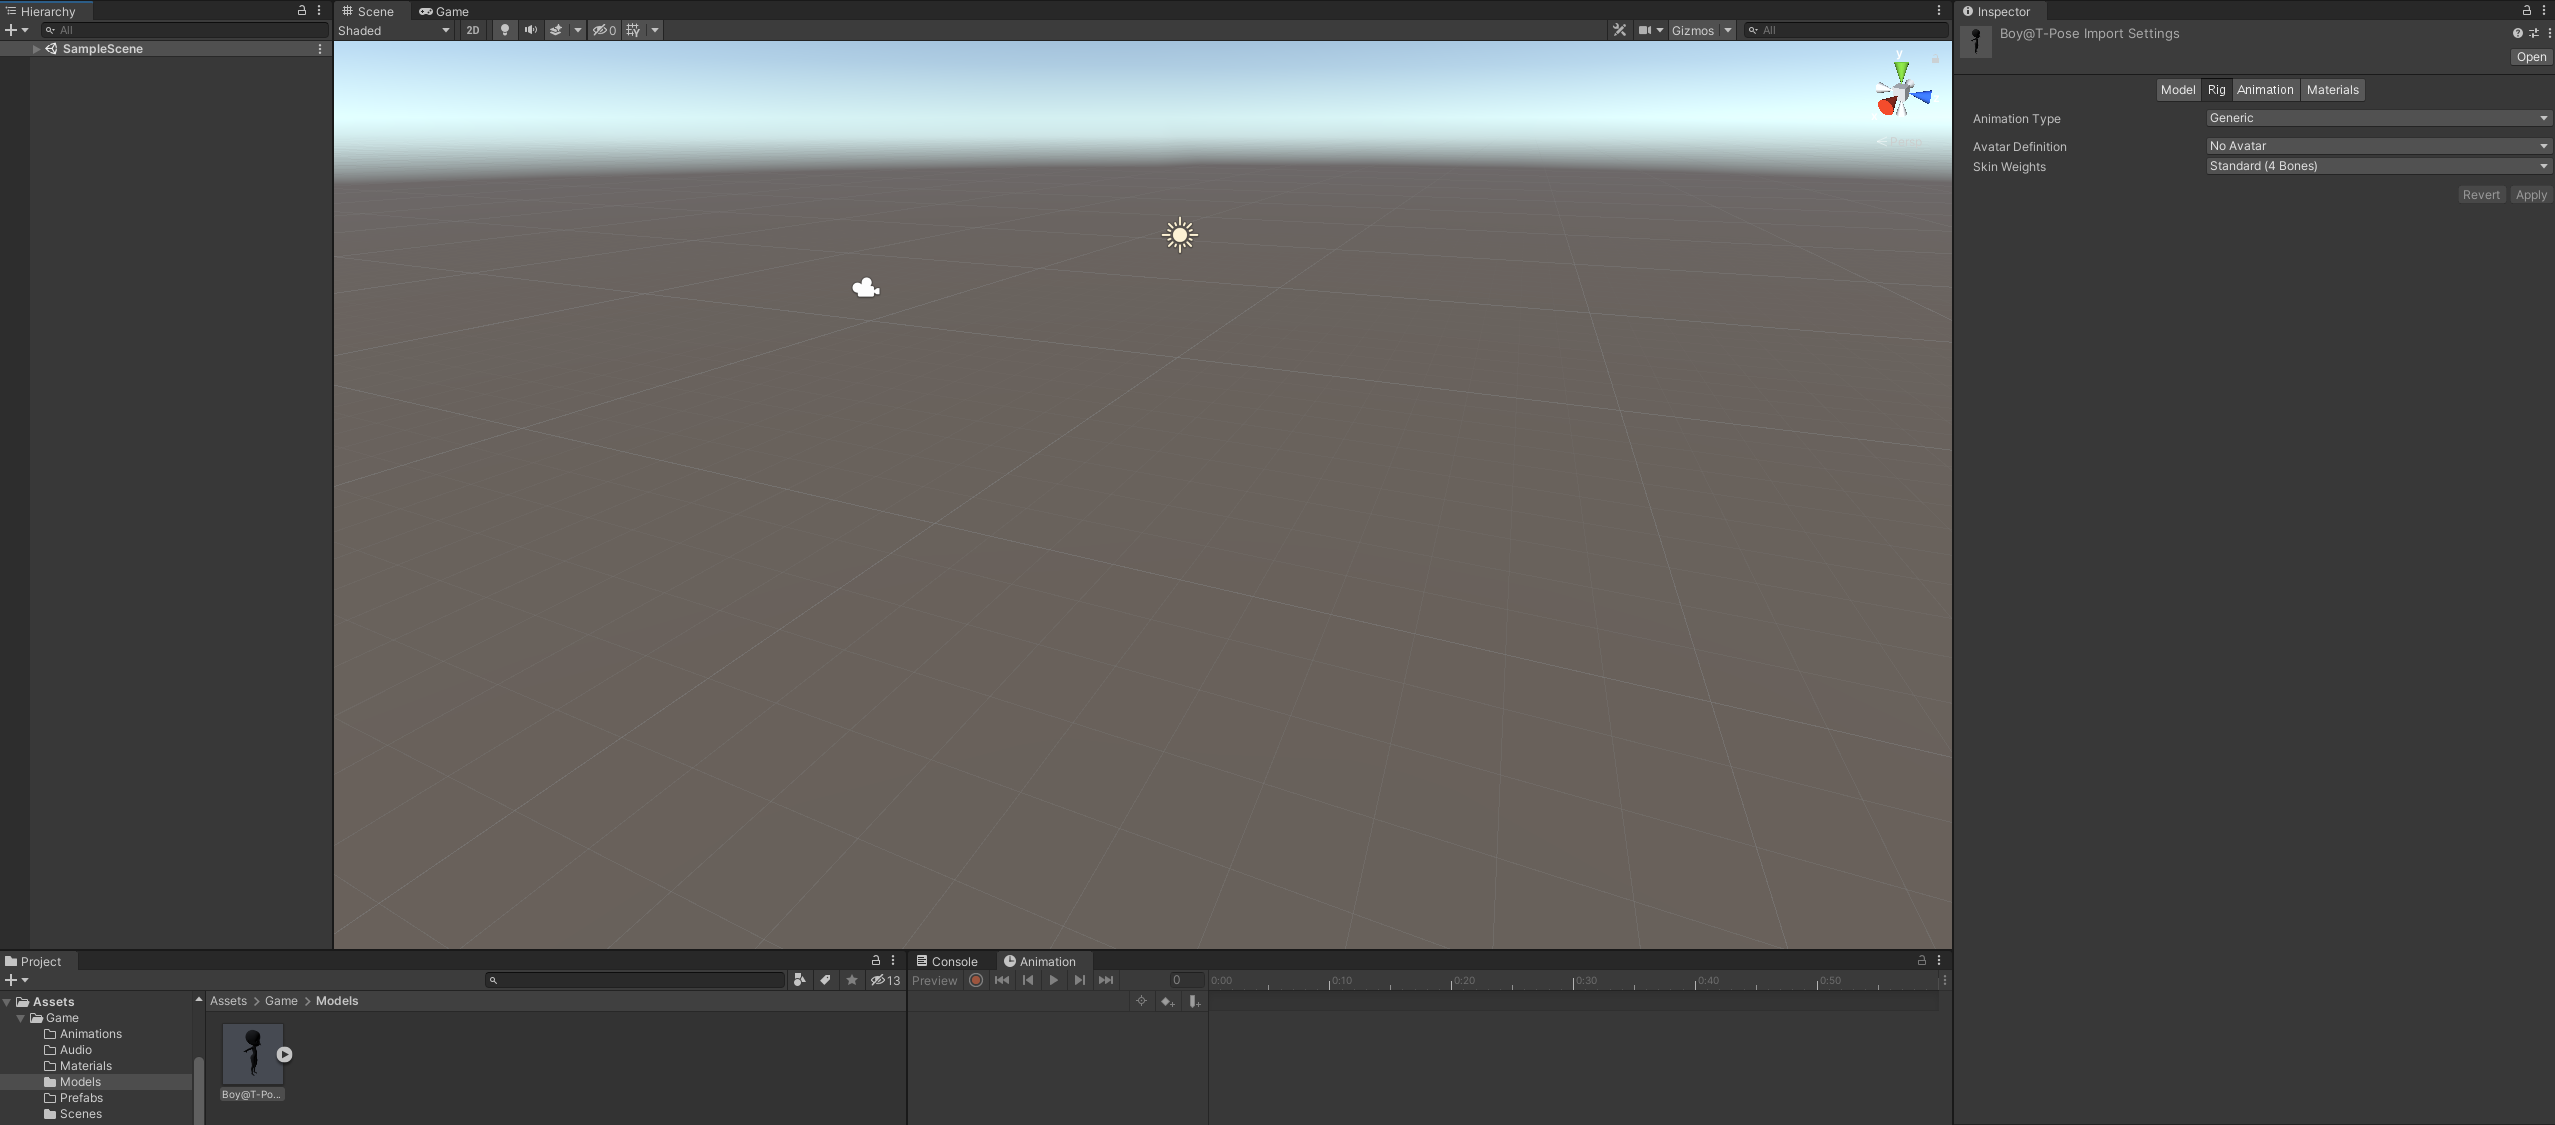
- Click on the FBX model file and click on “Rig” tab.
- Be sure the Animation Type is configured as “Humanoid”.
- In the Avatar Definition dropdown, select “Create From This Model”.
- Click “Apply”.
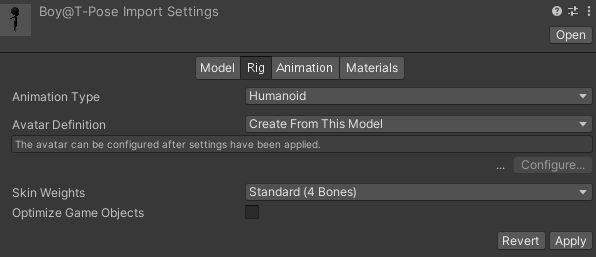
- Now in your project window, click on the little arrow next to the model you added. You’ll see an avatar down towards the bottom.
![]()
1.3.2 Add the model to your scene
- Drag and drop the character model into the hierarchy window or your open scene.
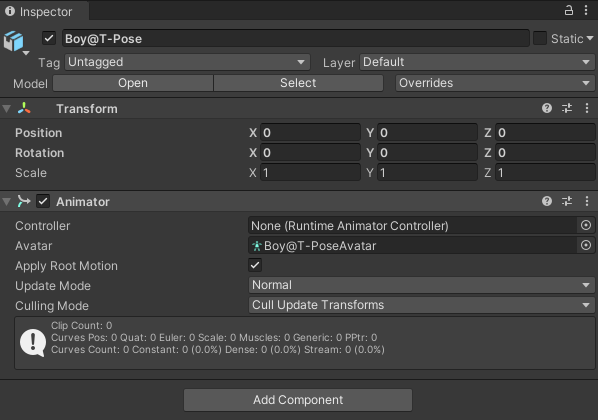
- The model should have the animator component attached to the character object (parent).
- If it doesn’t, add it manually. Then drag the avatar (refer to the image above) into the avatar slot on the animator component for the model in the scene.
1.3.3 Add an Animator Controller
- In your Animations folder for the project, create an Animator Controller
- Right click > Create > Animator Controller
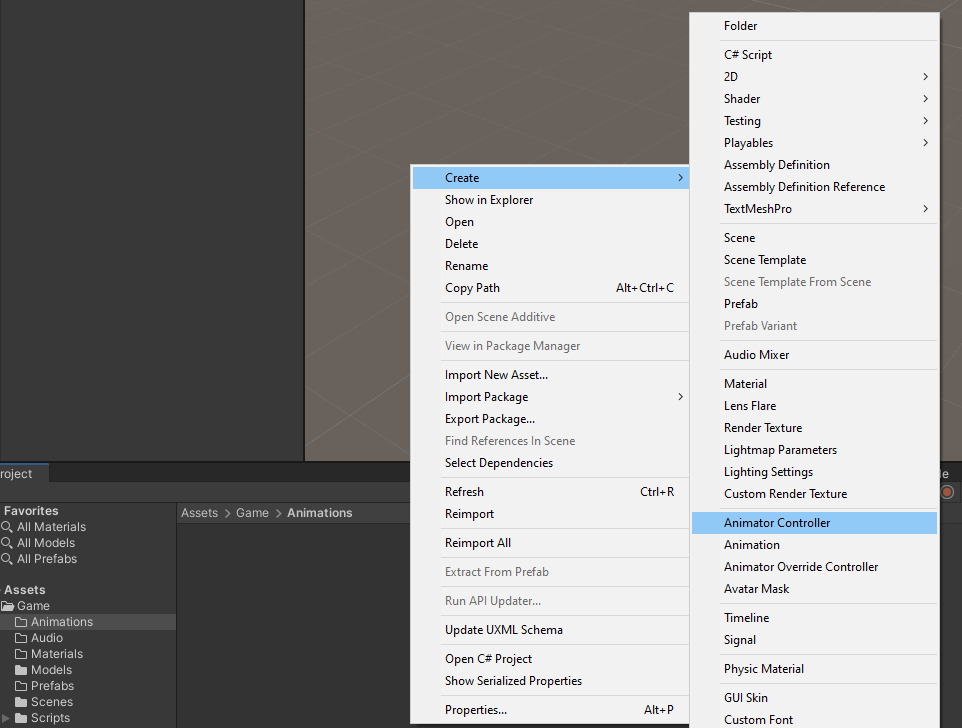
- Drag that controller to the open controller slot on your model.

1.4 Mixamo animations
1.4.1 Search for an animation
-
Go back to Mixamo. Your model should still be loaded there.
-
Search for an animation that you would like to download, and select that animation.
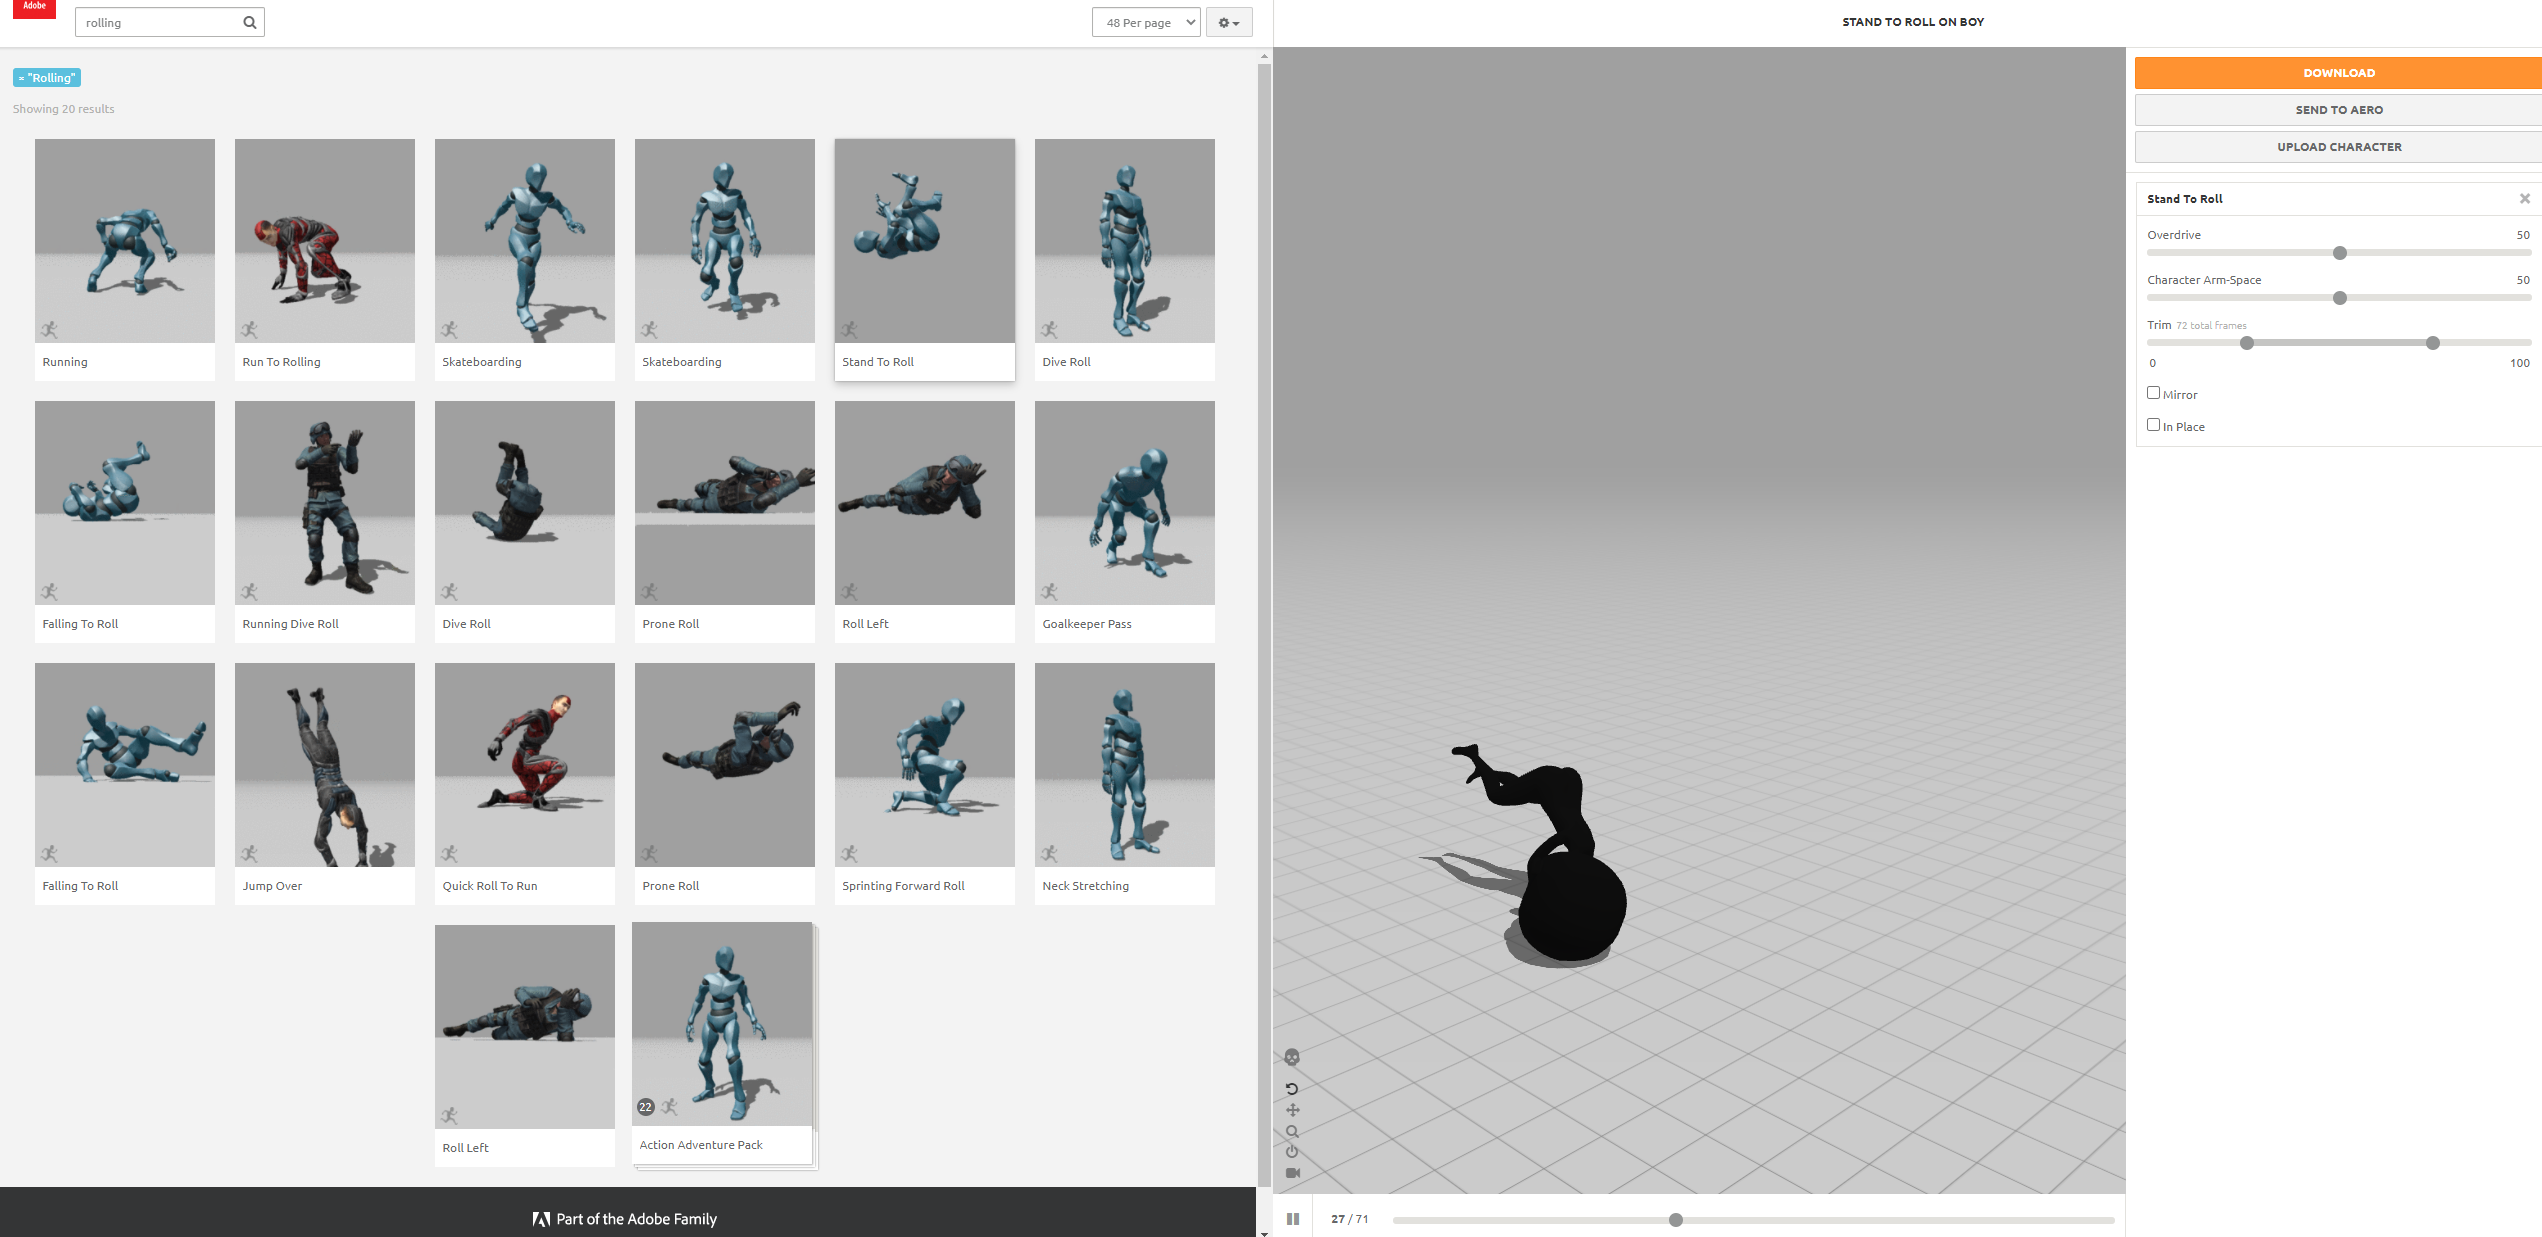
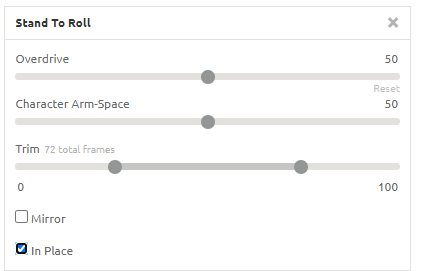
- Before downloading the animation, you should make sure that you have chosen the desired settings for the animation. They are displayed as different controls in the editor panel on the right. Some common settings are li speed, arm spacing, overdrive, mirror, in place, etc.
- For the sake of this tutorial, the checkbox for “In Place” is selected because we want to control the displacement of the character model through Unity scripts.
1.4.2 Download the animation
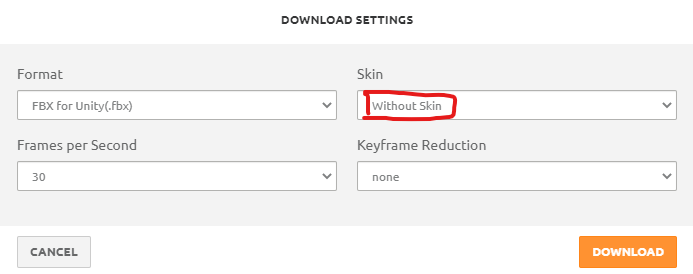
- Download that animation. Be sure to select “Without Skin” in the Skin dropdown because you have already downloaded the model with skin earlier that can be reused.
1.5 Importing the animation into Unity
1.5.1 Reuse existing avatar
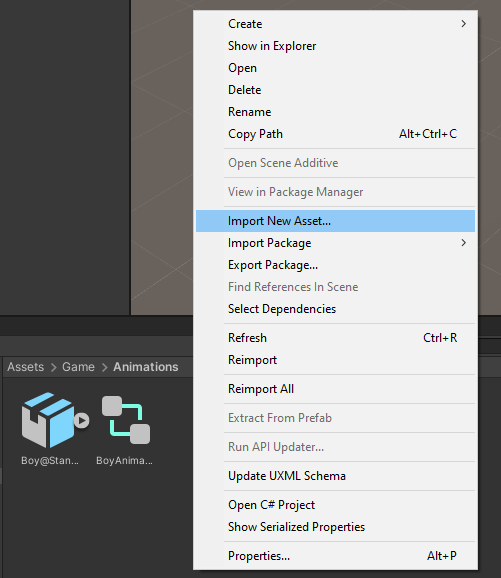
- Use the “Import New Asset” function in Unity to import the downloaded animation into the Animations folder.
- At the “Rig” tab, select “Humanoid”. At Avatar Definition, select “Copy From Other Avatar”.
- Choose the avatar created from the T-pose model.
![]()
1.5.2 Set up the Animator Controller
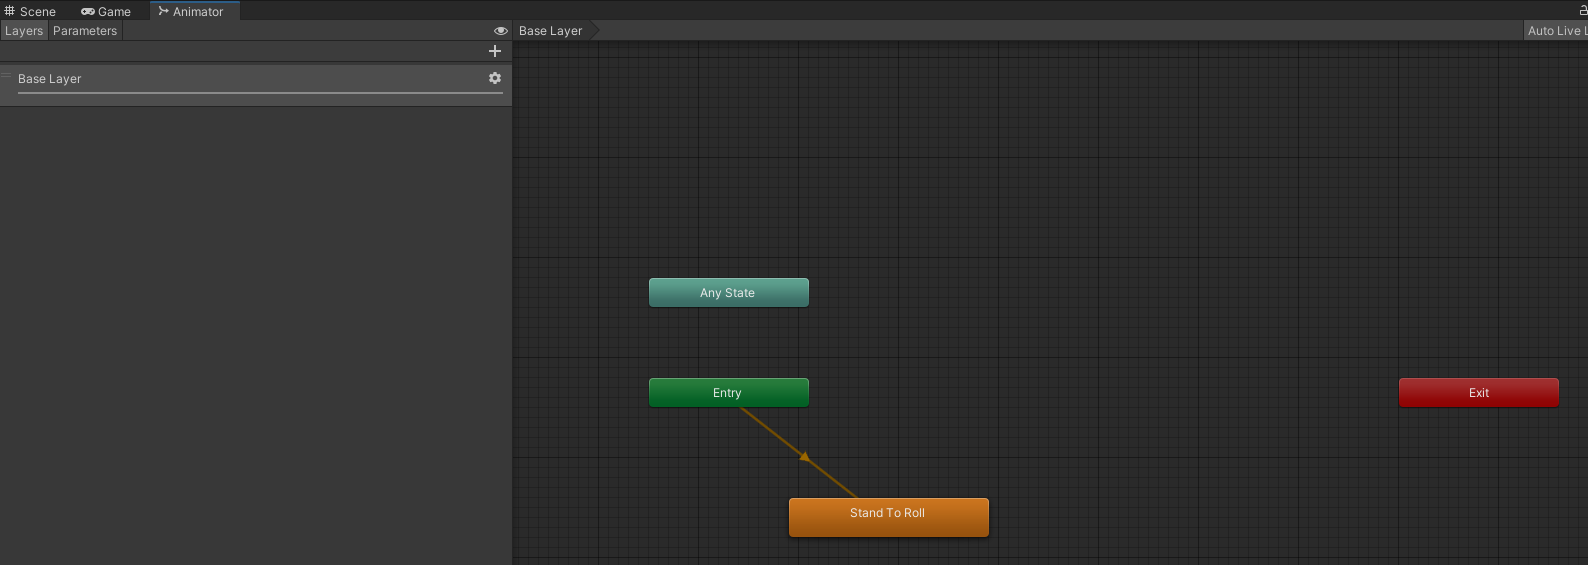
- In your model, double click on the animation controller you added earlier. Drag and drop the clip you just downloaded.
- Click on your model that you added to your scene in the Hierarchy. Click “Apply Root Motion,” set update mode to “Animate Physics.”

1.5.3 Add additional animations
1.6 Testing the animation
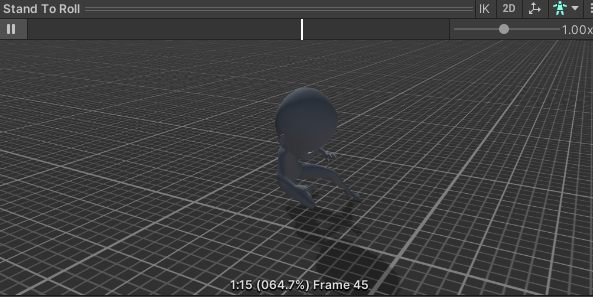
- If you select an animation file, click on the “Animation” tab.
- At the bottom, you will see an inspector with the downloaded model. Click on the “Play” button to test the animation.
2. Additional Tips
2.1 Missing materials
- If the downloaded T-pose model from Mixamo is not correctly showing the material/texture while the one you uploaded should have it, you need to manually extract the material in Unity.
- Select the downloaded model in the Models folder.
- Click on the “Materials” tab.
- Click on the “Extract Materials” button.
- Create a folder called Materials on the same level as the downloaded model file.
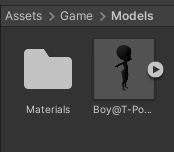
- This way the materials should reappear on the character model.
- Why Materials folder on the same level?
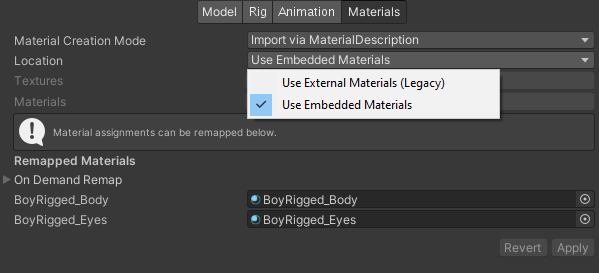
- Usually the character model is able to locate its extracted materials through the embedded option. In case the embedded way fails, we can choose the legacy option in the “Location” dropdown. It will automatically search for the Materials folder that is on the same level.
2.2 Other suggestions
- Add Rigidbody to your model, under constraints, for Rotation, check X and Z.
- Add a collider. Depending on your model, capsule or box collider may work best. Mesh causes a lot of additional problems, finish this step and you can tweak it later on.
- Add a couple of cubes to your scene to test, one for the floor and one for a wall.
- Place your model on top of the floor and in front of the wall.
- When you play your game, your character should not fall through the floor or walk through the wall.